One of the biggest questions I get asked about a lot; is how to embed video into an email? I think that we as marketers fantasize about opening up a beautifully designed email with a video thumbnail front and center, clicking the play button, and the video starts playing right there in the email client. This is in fact a dream. Although with some plugins and special software you can definitely configure video to play in email, but it will most definitely not work across email clients, browsers, etc. Forcing video to playback within an email client is not the answer. Instead you should to look at video as similar to other content collateral types.
Embedding video in email is very simple and if done correctly can yield amazing benefits in the form of conversions and detailed behavioral analytics. In this short guide I will detail how to embed a video in just a few steps and outline the specific components to make your video-based emails successful.
1. Build a home for your video
The obvious first step is to find a video hosting provider for your video. If you have not done this already, read one of our guides or browse our video software directory. For email campaigns do not use a free hosting provider like YouTube. There are a number of reasons not to use YouTube, the biggest in this case is our lack of control of the viewing experience with video player. For example, ads, annotation, competitive content — all this will distract from the goal of leading the viewer down a path to conversion. The best option is to choose a premium video provider that delivers a video player solution with branding control and analytics needed to measure your campaign.

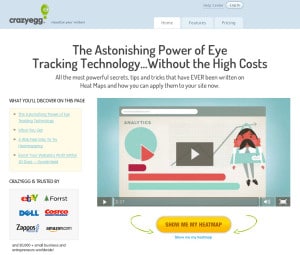
Example of a video playback page.
Once you have uploaded your video and created your branded video player, the next step is to build a home for that video content. The home is the master location where it will live, so when anyone wants to share the video, they will link back to this unique URL you are about to create. Associating a video asset with a unique location on the web is key for not only your email campaign, but it also has SEO benefits.
The home for your video will be called the “Playback Page,” this is will be where all viewing will take place and is also a great place to put a call-to-action in or around the video player. You can also look at the Playback Page as a video landing page. This page can be hosted on your own website or via a page generated by your marketing automation software.
2. Design a Thumbnail and Autoplay
Now that you have established a unique home for your video via a playback page with a clear call-to-action, it is now time to optimize your video thumbnail and enable autoplay. There are many reasons why it is great to optimize your video thumbnails, and there are a number of posts out there that detail how to do this and be the most effective, so I won’t go it to that right at the moment. What I will say, is that you want to design that thumbnail so when it is seen in the email, contacts will want to click on the play button and see what the content is all about.
A big decision you will want to make is whether or not to enable video autoplay on your playback page. This means that as soon as the contact lands on that page the video starts playing automatically. There are pros and cons to this approach. The Pros: enabling the video to start playing immediately increases the chances that the viewer will engage with the content and proceed through your call-to-action. The Cons: depending on how you are measuring and reporting conversion data, you will need to measure differently, since you are eliminating the action of “video play” from your conversion metrics.
I recommend video autoplay to increase your conversion rates and drive more engagement, so enable autoplay when it comes time to embed your video on your playback page and HTML email template.
3. Generate Embed and Tracking Codes
 When it comes time to generate your embed codes to be placed both in the HTML email and on the video playback page, you will want to take into consideration a few different things.
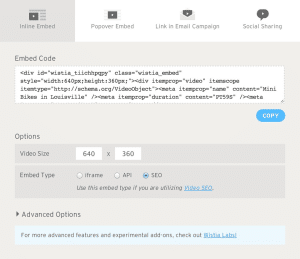
Video Player Embed: Generate a video player embed, either standard player or Lightbox to be embedded on the video playback page. If you are using a marketing automation system that allows for video engagement tracking to be passed to it, make sure it is connected to your video hosting platform where you are grabbing the embed code from. Remember to select “autoplay” so the video plays upon landing on the page.
Email Thumbnail Embed: Just like with the video player embed, you will need to generate an HTML email thumbnail embed, which most video marketing software will allow you to do very easily. Make sure the thumbnail is configured to the design you chose in step 2. Very important, you must link the email thumbnail to your video playback page, so when the contact opens the email, clicks your thumbnail, they land on a page where the video plays automatically and there is a strong call-to-action to convert.
4. Test the Flow and Analytics
Now that you have all the components pieced together it is time to establish a clear flow and see what data points can be extracted from your new video email. Here’s what the basic flow should look like in a series of steps:
Step 1: Contact receives your HTML email with the video thumbnail
Step 2: Contact clicks on the video thumbnail, which opens a browser to the URL of the video playback page
Step 3: Contact lands on the video playback page and the video starts playing
Step 4: Contact has either abandoned or completed the video and/or converted via call-to-action
The results are a controlled, branded, measurable video/email campaign. Detailed information on the contact’s behavior should automatically flow into the marketing automation or CRM system. A simple workflow like the one suggested above provides a solid video strategy for email. This same type of strategy can also be applied to all campaigns not just emails.
Subscribe to our blog to get more information on video and email.

